Monday, November 25, 2013

Sing No Sad Songs To Me, My Dearest

Sing no sad songs to me, my dearest, for I am not a sentimental fool

Sing no sad songs to me, my heart's cold and calloused for sure

Sing no more sad songs to me, my dearest, for loneliness plays his music just the same

Sing no sad songs to me, my dearest, for I am not a sentimental fool.


Wednesday, March 6, 2013

DIY: Yummy Summer Cooler - Coffee

Check out this simple yet yummy coffee cooler that will surely leave you asking for more!


Monday, March 4, 2013

DIY : Chocolatey Oreo Cupcakes

Because I am feeling kind and gracious right this moment, I will share to you one of my own versions of this famous recipe. I am partially inclined to anything chocolate, so I will give you my one and only Oreo Cupcake recipe.


Yup.

So if you are ready, come and get these awesome stuffs so we can start.

A cup and a half of milk.
A stick of butter.
Quarter of a cup of vegetable oil.
Half a cup of awesome chocolate powder.
A cup of self raising flour.
One beaten egg.
Half a teaspoon of baking soda.
A cup and two tablespoons of sugar.
OREOs - lots of 'em!


Alrighty then. Let's start.

Turn the heat of the oven up to 350 degrees F about 10 minutes before baking.

On a medium pan, put milk, butter, oil and the chocolate powder and heat it until the butter melts. However, do not boil the mixture. Milk tends to curdle when doing that, which is a no-no. Allow the chocolate mixture to cool to room temperature.

While waiting, prepare your cupcake pans by lining with cupcake paper cups. Put one Oreo cookie per cup.


When the right temperature is achieved, put flour, baking soda, sugar and the beaten egg. You can either mix it by hand - kind of an exercise - or you can use a mixer and beat till the stuff is properly incorporated. Pour into cupcake pans up to three quarters full and bake for 15 to 10 minutes or when an inserted toothpick comes out clean.


Remove from oven and let cool. Top with melted chocolate or frost it. Or, you can eat it by itself. It is yummy and moist and can be eaten without the added sugar, you know! That is what I like about this cupcake. But for this, I used my own special frosting and melted chocolate.


If you want frosting though, there are different kinds of available frosting online that you can use, best bet is to use a mocha flavored butter-cream frosting. I want to share my own recipe of the frosting I used but I totally forgot the measurements of the stuff I added. Sometimes, I made frosting right then and there, only to forget how much each of them weighed.

I will make a batch of these soon and share to you the frosting I made specifically for this cupcake so you can try how I eat them.

I also made a cake version, substituted coffee to Oreos and here it is:


Friday, March 1, 2013

DIY : Ombre Shorts

Ok.

So recently, I got so busy delving into another world that also exists in this Earth: the Internet. I was looking for things to do, things to craft and things to play as a way of relieving stress coming from my current job.

To be honest, I wasn't really looking for something, I was just surfing the net when I came across these cool-colored shorts that are clearly long pants not so long ago. Check these out:


(c) Internet, of course
I am a fan of breezy short pants and, boy! These are fashionable trendy! Being the researcher that I am, I quickly searched about this and where can I obtain one. I discovered it is called Ombre shorts . Sadly, some of these are from abroad and the ones here are just plain EXPENSIVE!

So hmmm.. How can I make one? Here's where the fun begins.
I got a lot of plain shorts so I closed my eyes and picked one, hoping it wasn't my favorite, in case I fail. And then I thought, "What shall I need?"

I Googled about how to DIY these and the first try (I typed "ombre short") I was directed to HAIRSTYLES! OMBRE HAIRSTYLES! Whatever Google!! But then when I saw the photos of the hairstyles, I realized, this is just the same as the shorts! It has layers of colors. Like this:


(c) whoever took Miley C's photo
Well, I am not a neophyte in bleaching hair, I've bleached and colored my hair following the rainbow shades already. All I have to do is combine those and wear my hair like the rainbow at once! Anyway, back to the shorts. Since it involves bleaching, I prepared everything I needed, if you want to do this, follow through:

MATERIALS
  • your not favorite shorts
  • NOT blunt scissors
  • a lot of bleach (I used Zonrox since it is by far the easiest obtainable bleach in the Philippines)
  • pair of gloves
  • old toothbrush (or new, whatever you like)
  • small basin
  • some patches or studs if you want them (I do but I haven't had any for now)
So by now you are ready and a bit nervous.

First, trim your shorts to your desired length. A short ombre shorts are so nice to look at! So, pick up a pen and line the legs and start cutting now! Make it into a V so when you wear it, it's not awkward.


forgive my poorly chopped pants! LOL

Right. See?


Okay! Put on your goody gloves and start working with bleach.
So fill a small basin up to half and then pour the desired amount of bleach and mix it well. Get your shorts and dip it up to where your desired bleach effect would be up to.

PLEASE! Avoid dripping on the other side of the shorts or you will see some unwanted spots. Total FAIL.

Wait for about 20-30 minutes to see the effect.
If you want to get a nice color, let it be submerged in the mixture for more or less than the time given, depending on your taste.


Yup, after 15 minutes.
I sometimes changed the position to achieve a balanced bleach effect on it. After 30 minutes, I removed it from the basin, spread it and brushed pure bleach on the center right where the color ends so I can remove some messy spots. You can do that - or not! c^^,)


Old toothbrush is very old and unused~

After that, I returned it to the basin to bleach it some more. Like this:


I waited for about 15 minutes more for this.
So after you got the color you wanted, remove it from the basin and wash it in flowing water, the bleached side on the bottom. Wash it well to remove all the bleach as bleach tends to be itchy on skin. Hang it to dry.


VIOLA! You have a pair of cool Ombre shorts! Attach the studs after it has dried and wear to flaunt!


Here's mine! \ (^_^) /
Right. Don't bother my beautiful face! haha

Tuesday, February 12, 2013

The Beach Effect

So, recently I went back to my hometown to attend my brother's wedding ceremony. What's more is that I also am the official wedding cake designer! Whew! I brought a friend with me to go home and after  few days of preparation fiasco, I made another cupcake tower of blueberry and carrot cupcakes. The top part was the red velvet cake which is a favorite of everyone.

After the wedding, we went to the beach to hit the ocean and said hello to sunburns! Here are some of our awesome photos of the clouds and some rocks!

*by the way, for those who do not know, I only use one kind of camera for this blog and that is the iPhone 4s camera. No DSLR or any of those stuff. Editing is done within the phone too*


On the way to the beach..


Hard to deny the beauty of the sky, eh?


Yep. Clouds are like, awesome!


Anyways, that is not all. I got some nice panoramic photos about the beach (some pictures with the species "ME" included. LOL! I enjoy the beach so much and I never miss the opportunity of taking photos everytime I visit. Check these out!


Here's the view of the epic sand and water while we were still preparing to take a swim.


This. This is a nice strip of white sand, no?


And this is the small rock-cave form I love!


Here it is again, with me in the left. haha!


Another take! Sometimes you just gotta think, maybe the rock loves all the attention!


Oh that is the beach, in another angle and side. With me, of course!
Pretty cool, right?
Before we went home, we also took fun photos! Scroll down and you will see how I am having fun with the camera! :) My pretty pretty friend is the willing subject!


Playin' in the sand, yes!


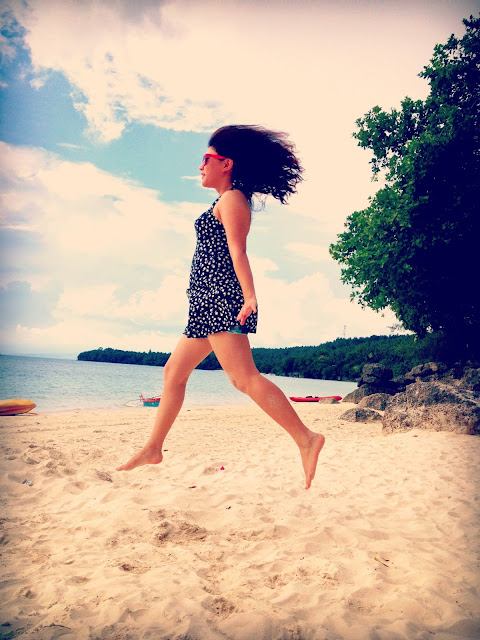
Aaaaand of course, there's this jump picture! :)
However, let me show you some of my favorite photographs. Few of my levitation photos. I would have gotten a lot more of these and a lot better angles but the light is fading and we are still to prepare our things before we go back home. So, look down and see what I got under the circumstances. You will not regret it!


Oh, yeah!!


Float
oooooooh.
THIS is my favorite. :)


viola!! Levitate!


Hmm, so I asked my friend to get some levitation photos of me. I would never miss doing such awesome stunt as this and capture it on camera. So here goes...


Oh, by the way, here's the photo of me with my cupcake tower during my brother's wedding! We both made it! It's not much due to a lot of thing that happened that day and my planned decoration for it was thwarted. I did enjoy making it though! :)